Learn to Use Your Tools Recap
Workshop Recap and Review Guide
Thank you again to everyone who joined me for the Learn to Use Your Tools workshop. I truly enjoyed joining all of you to explore the essential composition and focus techniques needed to capture the real beauty in your gardens. Your questions were fantastic!
This recap contains some great resources to help you continue learning about the power hidden in your iPhone camera:
- Workshop Study Guide: A clean, organized summary of everything we covered, from the Rule of Thirds to the Exposure Slider.
- Comprehensive Vocabulary List: Precise definitions for every term we used, from Focal Length to Portrait Mode.
- Note-Taking Tool: A handy outline that links directly to key timestamps in the full video recording, along with suggested questions for AI or Search Engines to deepen your knowledge.
What’s Next: Pruning Your Photos
If you’re ready to move beyond the snapshot and truly shape your photographs into art, join me for the next workshop in the series: Prune Your Photos in February 2026. Anyone already registered can bookmark and share that page and it will unlock for you soon!
That's right. You can share the workshop page with anyone and they will get access to it as soon as they register. I'm so excited to have fixed my membership system since last time 😄.
- Focus: This session is highly interactive! Just as we prune a hedge for better growth, we will learn how to edit a photo to enhance its story.
- Your Turn: I will be asking participants to anonymously submit their photos for a friendly group critique to practice our editing and ranking skills.
I look forward to seeing the incredible photos you take between now and then!
Workshop Review
Use this guide to follow along with the pre-recorded video session on YouTube: Garden Photography Learn to Use Your Tools. I've highlighted three key timestamps for each major concept, along with targeted questions to guide you in learning more about each subject.
Participants in the workshop, or those they share this page with, will be able to view the full workshop recording on YouTube.
Watch the full workshop now!
1. The First Tool: Composition
Composition is the first, and in some ways most important, tool for anyone taking photography seriously. It is the art and the science of where you put things in your frame. No amount of editing can fix a boring photo, but good composition can make a simple subject fascinating.
The Rule of Thirds Grid
The Rule of Thirds is the foundational guideline for creating engaging photos.
- What it is: The image is imagined as divided into nine equal segments by two horizontal and two vertical lines.
- Why it works: Human eyes are binocular. We naturally prefer looking a little to the left or right, rather than staring directly at the center. Placing your subject dead center can feel aggressive or flat.
- How to use it: Turn on the Grid in your iPhone settings. Place your main subject (a flower, a bee, a leaf) on one of the four intersection points where the lines cross. These points are where the eye naturally wants to rest and travel between.
Key Timestamps (HH:MM)
- 06:00 The grid is drawn and introduced as the basic tool.
- 10:00 How to turn on the Grid in your iPhone settings.
- 12:00 Explanation of why humans prefer off-center composition (binocular vision theory).
Suggested Further Exploration
- Google/YouTube Search: "What is the Fibonacci Spiral and how does it compare to the Rule of Thirds for composing a flower photo?"
- AI Question (ChatGPT/Claude): "Explain the difference between 'Negative Space' and 'Positive Space' in macro photography and why I should use Negative Space."
- Siri Command: "Siri, open settings and show me the camera menu."
Depth & Focus
A photo is a 2D copy of a 3D world, so we need to intentionally create depth to make it feel real.
- Create Layers: Try to have something in the foreground (close to you), your main subject in the middle ground, and a background that is far away. This mimics how our eyes perceive distance.
- Tap to Focus: Your iPhone camera guesses what you want to see. If it guesses wrong, tap the screen. The yellow box tells the camera "Look here!" and it will immediately adjust the focus and lighting for that specific spot.
Power Tools: Lenses, Exposure, and Flash
Once you have your composition, use these tools to control how the iPhone camera captures the scene outside of automatic mode.
Avoid Flashing Your Flowers!
We looked at the difference between flash and natural light.
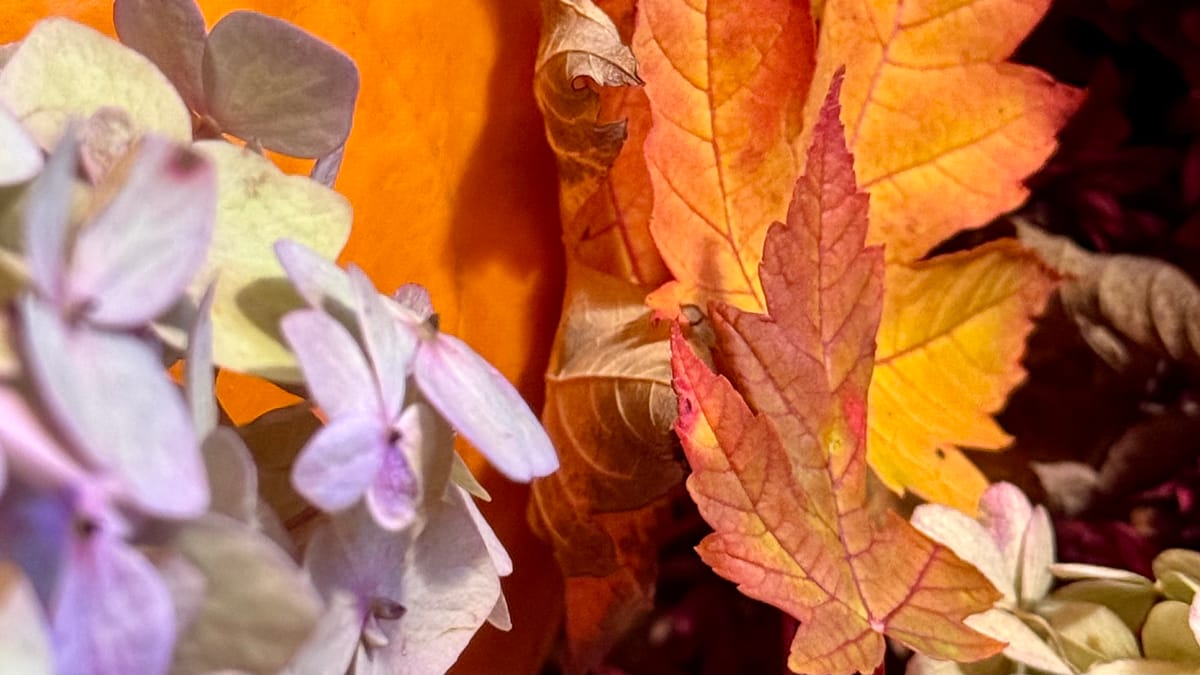
- The Problem: The flash blasts light directly from the front. This fills in all the shadows, and shadows are what show us texture. Without shadows, a pumpkin looks like a flat orange circle.
- The Solution: Turn your flash to OFF or AUTO. Adjust your angle or light source to allow natural light to create shadows.
Exposure: The Sun Slider
Sometimes the camera thinks a scene should be bright when you want it moody, or dark when you want it bright.
- The Fix: Tap the screen to get the yellow focus box. You will see a little sun icon. Slide that sun up to brighten the photo or down to darken it.
- Use Case: Slide it down on a bright cloudy day to reduce the glare, or slide it up at dusk to capture the last bit of light.
Lenses by the Numbers
Those numbers at the bottom of your screen (0.5, 1x, 3x) are not just "zoom." They are different lenses.
- 0.5x (Ultra Wide): Like a security camera. It pushes everything away and shows a huge view. It is great for small spaces or big landscapes. This lens also powers the Macro mode, which zooms in close, but at reduced quality.
- 1x (Main): This is your standard view. It is roughly what your eye sees.
- 3x (Telephoto): This brings things closer without you having to move your feet. It is great for isolating a single flower without stepping in the mud, but may not be strong enough for distant subjects.
Key Timestamps (HH:MM)
- 27:00 The numbers (0.5, 1x, 3x) are introduced as different focal lengths.
- 30:00 Explanation of the Wide-Angle (0.5x) lens and its use in small spaces.
- 48:00 Demonstration of the Exposure "Sun Slider" and how to manually adjust brightness.
Suggested Further Exploration
- Google/YouTube Search: "How to balance exposure when taking close-up photos of flowers on a very sunny day."
- AI Question (ChatGPT/Claude): "Give me three actionable exercises for mastering the exposure slider (the sun icon) in different outdoor lighting conditions."
- Siri Command: "Siri, how do I capture a close-up picture of a moving bug using Burst Mode on my iPhone?"
3. Advanced Modes
We briefly touched on the "computer magic" your phone can do. Use this section as a springboard to explore the camera's computer-assisted and pro-level modes.
- Portrait Mode: Uses computer math to blur the background, mimicking the look of expensive professional lenses. It is great for isolating a single bloom.
- Live Photos: Captures a tiny video with your photo. You can edit these later to pick the perfect split-second moment (like when a bug flies away) or turn them into a "Long Exposure" to make water look misty.
- Aspect Ratio: The shape of your photo. 4:3 and 8:10 are standard print photos (most prints you have ever held are between these two shapes). 16:9 is wide like a TV or a Landscape Panorama photo. 1:1 is square like a classic Polaroid.
Key Timestamps (HH:MM)
- 44:00 Exploring different Aspect Ratios (1:1, 16:9, 4:3).
- 53:00 Tapping the screen for Focus lock and the effect on exposure/depth.
- 59:00 Introduction to Portrait Mode and its "math" (artificial background blur).
- 1:07 Introduction to Live Photos and finding the best "Key Photo" in a sequence, featuring a fly who followed the flowers into my office.
- 01:13 Discussion of the RAW file format (massive files) versus HEIC.
Suggested Further Exploration
- Google/YouTube Search: "What is 'lossless editing' and how does it apply to HEIC vs. RAW photos on an iPhone?"
- AI Question (ChatGPT/Claude): "What are the common visual glitches that occur in iPhone Portrait Mode when photographing complex subjects like leaves or vines?"
- Siri Command: "Siri, show me how to turn a Live Photo into a Long Exposure photo."
Photography Vocabulary List
Explore these terms through internet searches, AI companions, or asking questions in the comments below. I'll do my best to reply!
Aperture
- On a large camera, this is a physical opening in the lens.
- On an iPhone, the term refers to the simulated lens adjustment used in Portrait Mode to control the depth of field.
Aspect Ratio
- The shape of your final photograph, based on its proportional width versus its height.
- Examples include 1:1 (square like a Polaroid) and 16:9 (wide like a modern TV screen).
Composition
- The foundational art and science of deciding where you put every element in your frame.
- Good composition is the key to an interesting photo, even without editing.
Cool/Warm Mode
- A feature in the "Styles" setting used to adjust the color mood of your photo.
- Cool adds blue tones (for a calm or chilly feeling).
- Warm adds yellow and red tones (for a cozy, vibrant, or autumnal feeling).
Depth
- The illusion of three-dimensional space in a flat, 2D photograph.
- It is created by setting up three layers: foreground, subject, and background.
Depth of Field
- The specific area of the photo that is sharp and in focus.
- Shallow Depth of Field is when you intentionally blur the background (often using Portrait Mode) to make your subject look crisp and defined.
Exposure
- The measurement of how bright or dark your entire photo is.
- You manually control this by tapping the screen and using the "Sun Slider" to increase or decrease the light.
Focal Length
- The technical term for "zoom," which determines the lens's field of view.
- The camera's 1x zoom is equivalent to a standard 35mm film camera view.
Focus
- The act of getting a subject to look sharp and clear.
- If the camera's automatic brain chooses the wrong focus point, tap the screen; the yellow box that appears confirms the camera is following your manual instruction.
Gridlines/Grid
- The two vertical and two horizontal hairline guides that divide your screen into nine sections.
- Used to help you align your subject according to the Rule of Thirds and keep your Horizon straight.
HEIC/JPEG
- Standard file formats for digital photos that are automatically compressed to save storage space.
- HEIC is Apple's newer, more compressed and higher quality format. JPEG is an older, universally compatible format.
Horizon
- The level line where the land or sea appears to meet the sky.
Leading Lines
- A compositional tool that uses existing lines in the scene (like a path, a fence, or a row of planters) to guide the viewer's eye directly to your main subject.
Live Mode/Live Photos
- A camera feature that captures a standard photo plus a short three-second video clip around the moment you press the shutter.
- Useful for capturing the perfect split-second moment or creating a Long Exposure effect.
Long Exposure
- A style of photo that makes moving things look blurry and soft.
- Often used to make running water look like mist or blur traffic lights into streaks.
Mirror Front View
- A setting in your camera options that ensures text and signs in a selfie are flipped correctly in the final image, rather than appearing backward like in a mirror.
Panorama
- A special photo mode used to capture an extra-wide picture by sweeping the camera horizontally or vertically across a scene.
Portrait Mode
- A camera mode that uses computer math to create an artificial shallow depth of field, blurring the background while keeping the main subject sharp.
RAW
- The raw, uncompressed data from the camera's sensor.
- These files are massive and are generally only used by professionals who plan to edit photos extensively on a computer with software like Photoshop.
Rich Contrast
- A "Style" setting that intensely increases the difference between the light and dark parts of your image, resulting in richer, deeper shadows.
Rule of Thirds
- The foundational compositional guide stating that photos are more interesting when the subject is off-center, placed at one of the four grid intersection points.
Styles/Filters
- Pre-set color and tone adjustments you can apply to a photo, like applying a color gel over the lens.
View Outside of the Frame
- A camera setting that shows the content just outside the edges of your photo with a blur, helping you predict if a person or animal is about to enter the frame.
Wide-Angle Lens
- The 0.5x zoom setting. It captures a large field of view, making objects look farther away.
- Excellent for shooting in small or tight spaces, like a densely packed flower bed.
Comments ()