Foreground Focus
Objective
When we take photos, we often get so focused on our main subject that we ignore the space right in front of our lens. What happens when we use that space to build a story between the camera and the subject, when we make the blurry foreground just as important as the subject, or even decide to focus on the foreground and let what would normally be the subject become more uncertain?
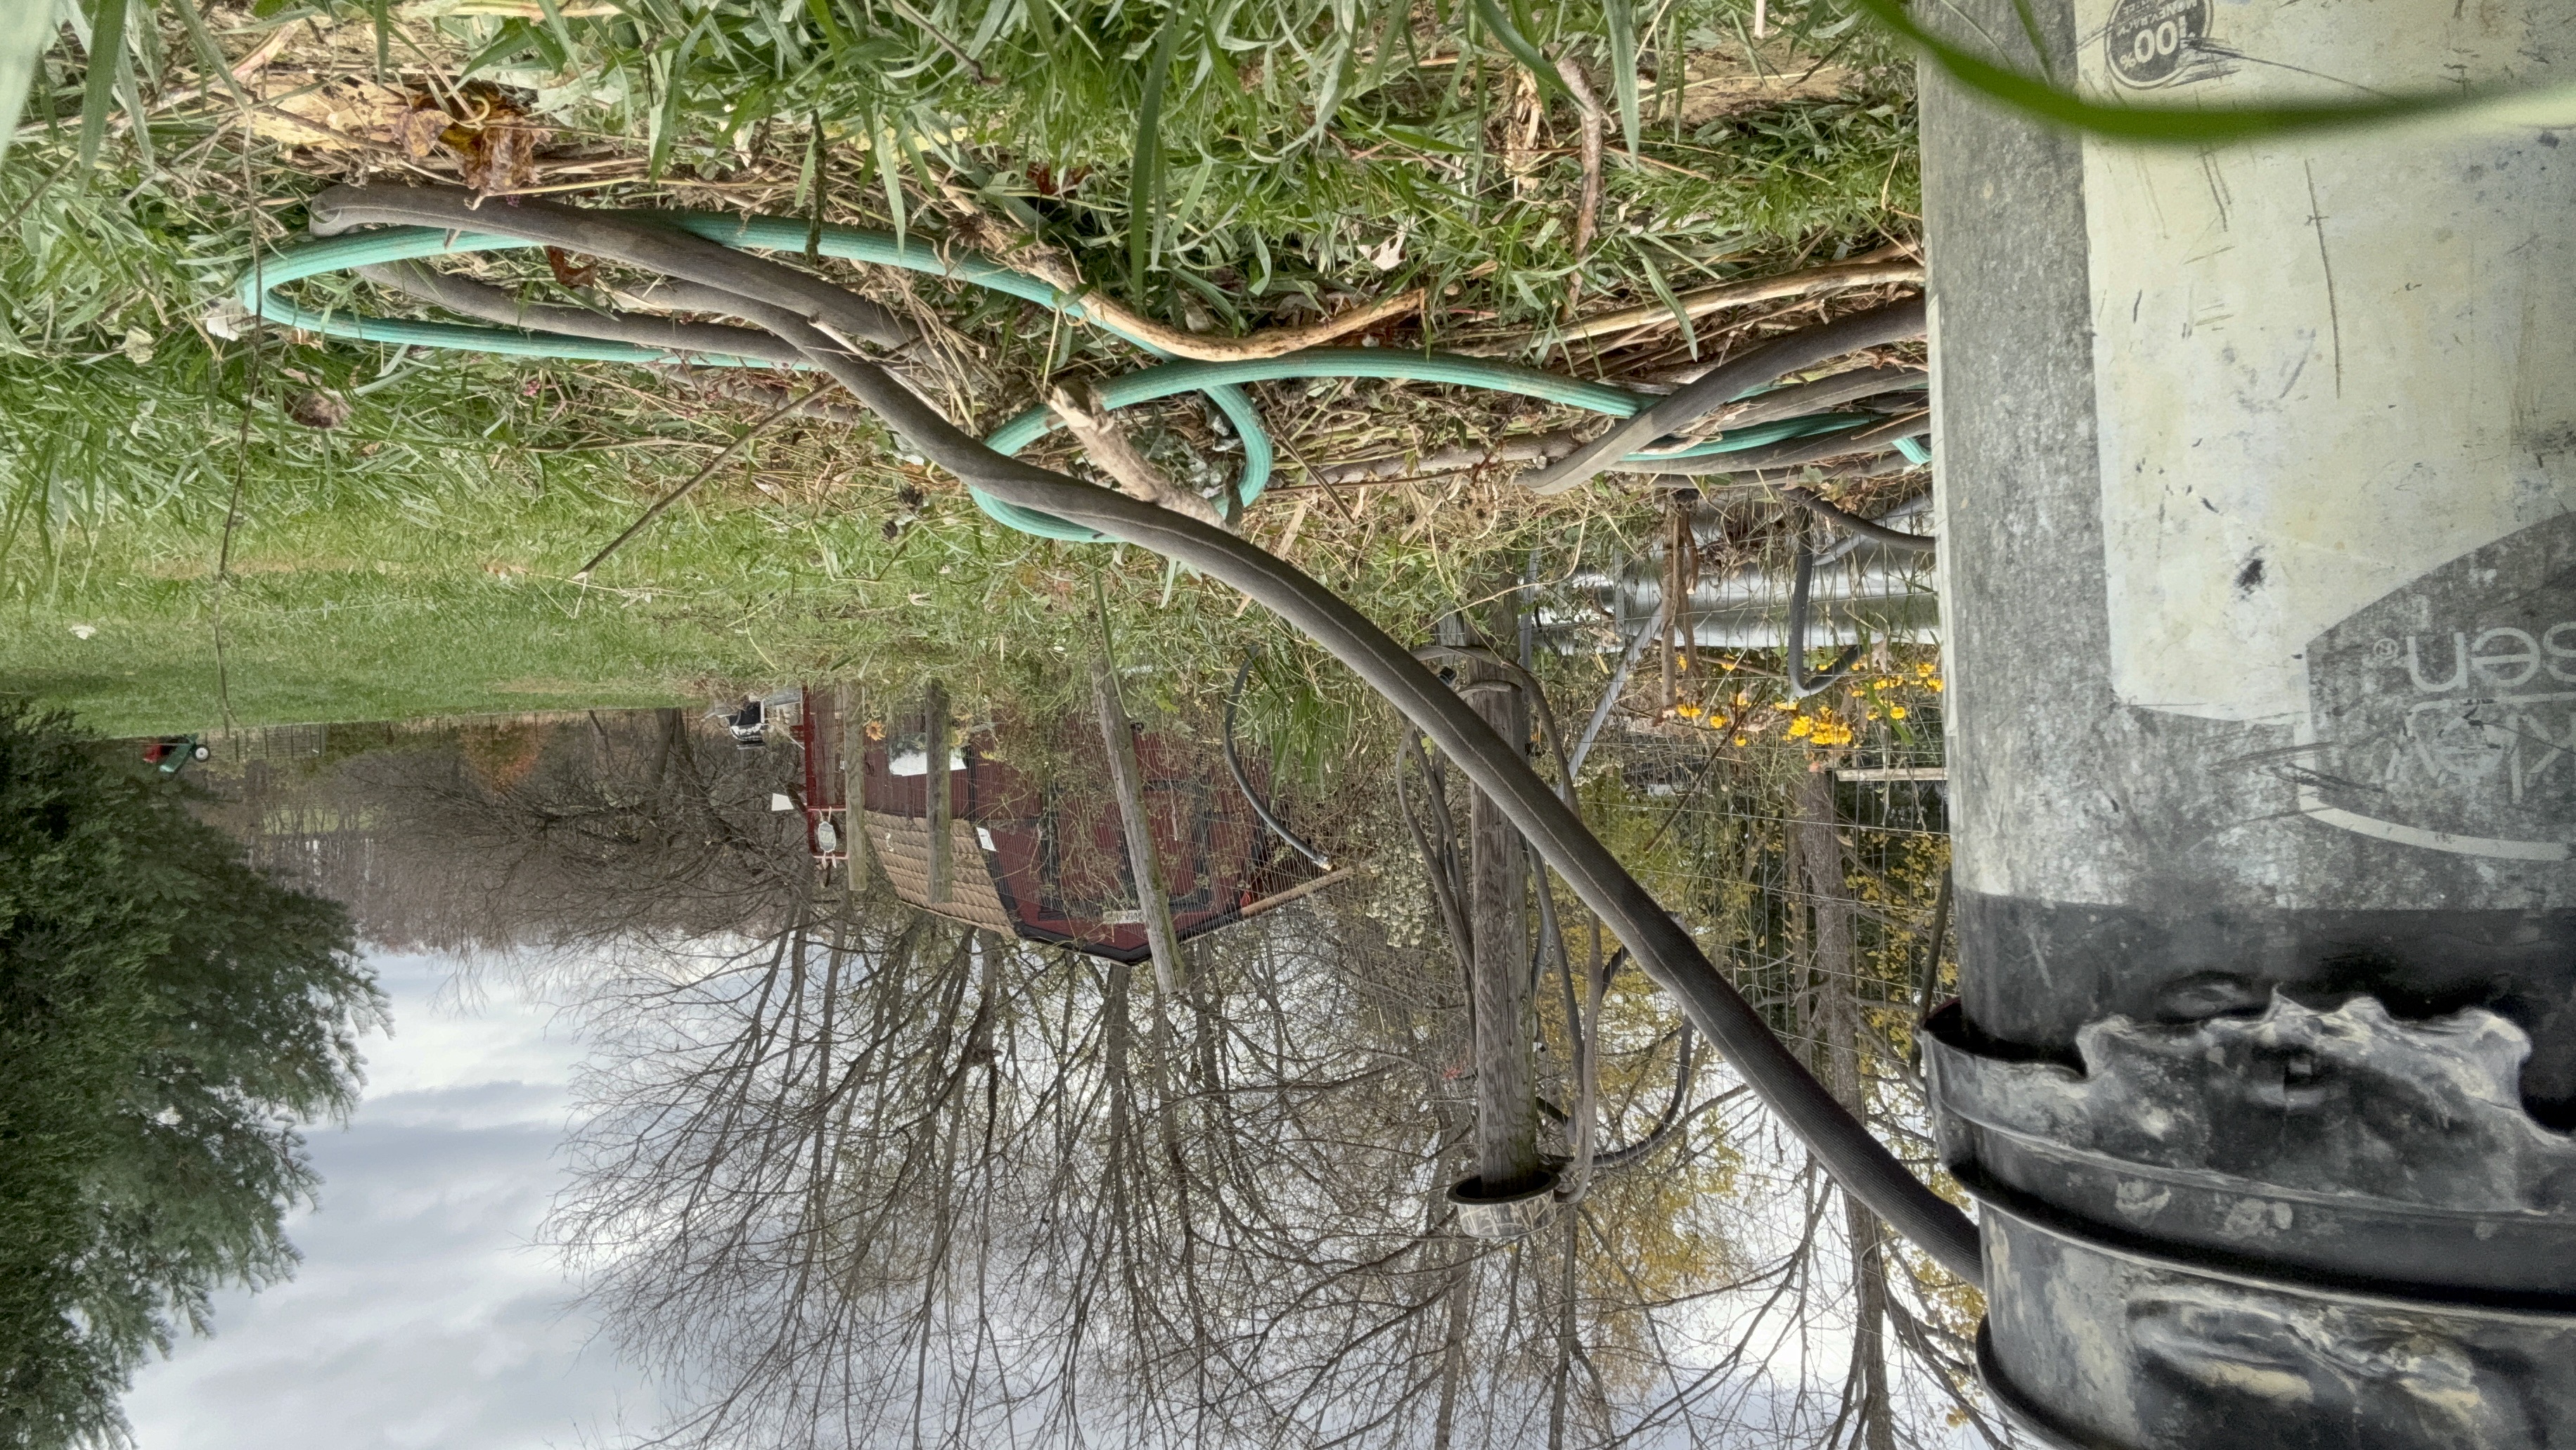
This week we are exploring Foreground, which is the area between your camera and your subject that either separates the viewer from the action or places the viewer right into the middle of the scene. By breaking your photo into layers of distance from the camera, you force the foreground, the midground, and the background to work together. Whether you are placing a curious sheep in the foreground while geese squabble over a failed bread-baking experiment on the other side of a fence, or setting your camera down by a water bucket before a long walk across the pasture, those layers build a visual narrative.
Our goal this week is to use Foreground, depth of field, and framing not just to fill up empty space, but to transform the scale, separation, and story of your scene.
Video Guide
View on Youtube: https://youtu.be/uMoKzGJ6_HU
Warm-Up Prompts
To warm up our thinking, consider these prompts. You don’t have to answer them, but read them over and try to find the one that sparks something in your brain.
Remembering: In your own words, what is the foreground of a photograph? How does it differ from the midground and the background?
Understanding: What does it mean to say that a foreground can either “separate” the viewer or “place” the viewer inside the story?
Applying: Without a camera, hold your hand up a few inches from your face and look past your fingers at a chair or window across the room. Notice how your hand turns into a soft, blurry frame while the distant object stays sharp. Now shift your attention onto the lines of your palm. What happens to the room behind your hand?
Analyzing: Look at the photos in the Inspiration Gallery. Which images use a sharp object in the foreground to show scale? Which ones use an out-of-focus foreground to frame the subject in the distance?
Evaluating: “Putting objects between the camera and the subject just clutters the frame and hides what is important.” Do you agree or disagree, and why?
Guide
Build the Story in Layers. Think of your photograph as a set of distances from your lens. Instead of standing in an open spot with a clear view of your subject, look for ways to include a foreground, a subject, and a background that are obviously separate from one another. Ask yourself how your perception of a subject changes as you add more and more space between it and your camera.
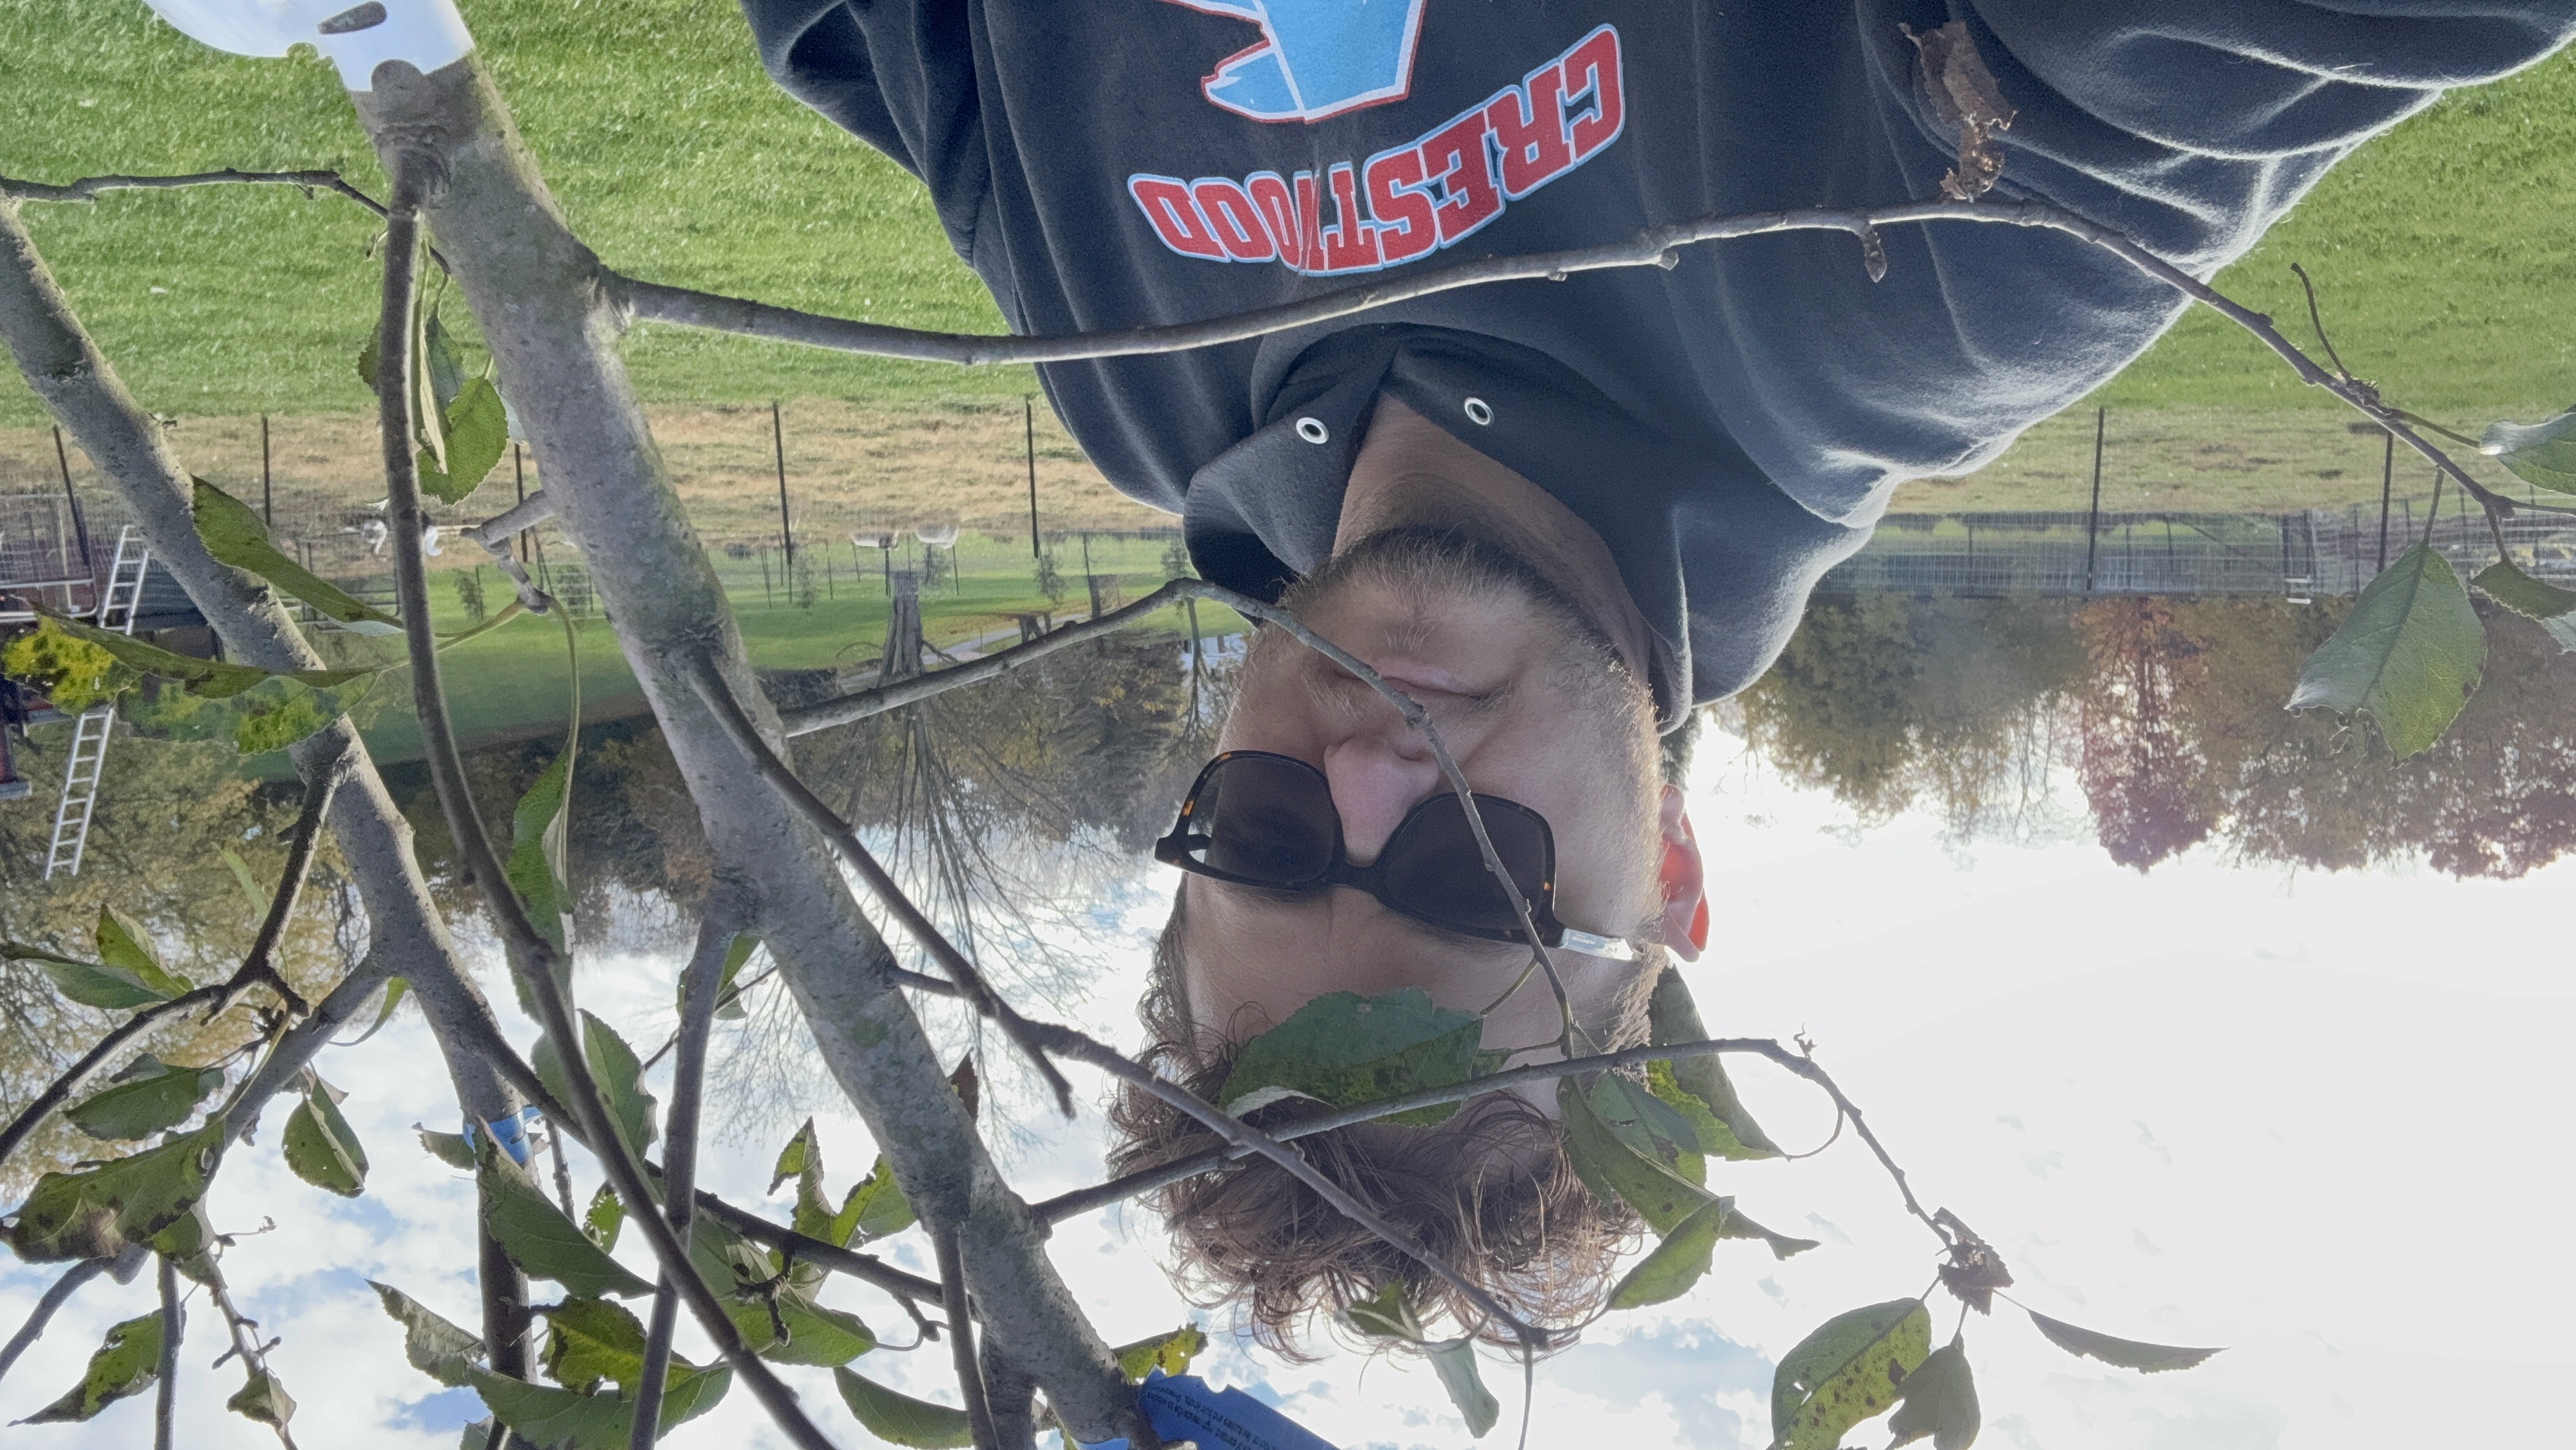
Separate or Place the Viewer. Let your photo show the wire of a fence you’re shooting through, peer through the branches of an apple tree, or look over the shoulder of another person in the scene. Notice how putting a physical barrier in the foreground can make the audience feel like a hidden observer peeking in from the outside, or make them feel like they are standing right there with you.
Exaggerate Scale and Drama. Set your camera down low and get close to an everyday object, like a bucket of water, a garden hose, or a toy on your desk. When you pair a close position with a wide angle lens, a simple object towers dramatically in the foreground while the grass and sky stretch away into the distance. This is the foundation of many forced perspective tricks.
Make Your Subject Stand Out. When you have a busy foreground and a detailed background, you have to make sure your main subject does not get lost in the middle. Experiment with three different tools to command attention:
Focus and Aperture: Tap your screen or open your aperture to a low f-stop so the foreground melts into soft bokeh while your subject stays sharp.
Brightness and Contrast: Look for a subject that is brighter, darker, or more colorful than the layers around it.
Scale and leading lines: Use a trailing hose, a fence line, or the sheer size of your subject to pull the viewer’s eye right to the heart of the frame.
Process
Decide on your personal goal. Do you want to make an ordinary object tower over the landscape from a low angle? Shoot through blurry leaves or a fence to frame a candid moment? Or stage a two-part interaction where our interpretations of the foreground and background characters change depending on who is in focus?
Challenge yourself to try at least one new idea from the guide while you shoot. Let the layers between your lens and your subject push you to move your feet and see your environment differently.
Prepare to take photos:
Scout your yard, room, or neighborhood for foreground layers like fences, branches, doorframes, furniture, or tall grass.
Check your Focal Length and Aperture options so you can control how much of the foreground stays sharp and how much blurs into bokeh.
Pay attention to your Exposure and shutter speed, especially if you are photographing moving animals or shooting from the shade of a tree out into bright light.
Capture more photos than you think you need. Experiment. Play. Balancing focus across multiple layers can create photographic magic or a total mess, and the misses are part of the process.
Make every photo unique. Take one shot where the foreground object is completely blurred out and the distant subject is sharp, then tap to focus on the foreground object so the background turns soft and dreamy.
Pick four photos to share with our classroom.
Try to provide the f-stop, shutter speed, and ISO. If you switched lenses or tapped a specific layer on your screen to lock focus, tell us about that too!
Inspiration Gallery
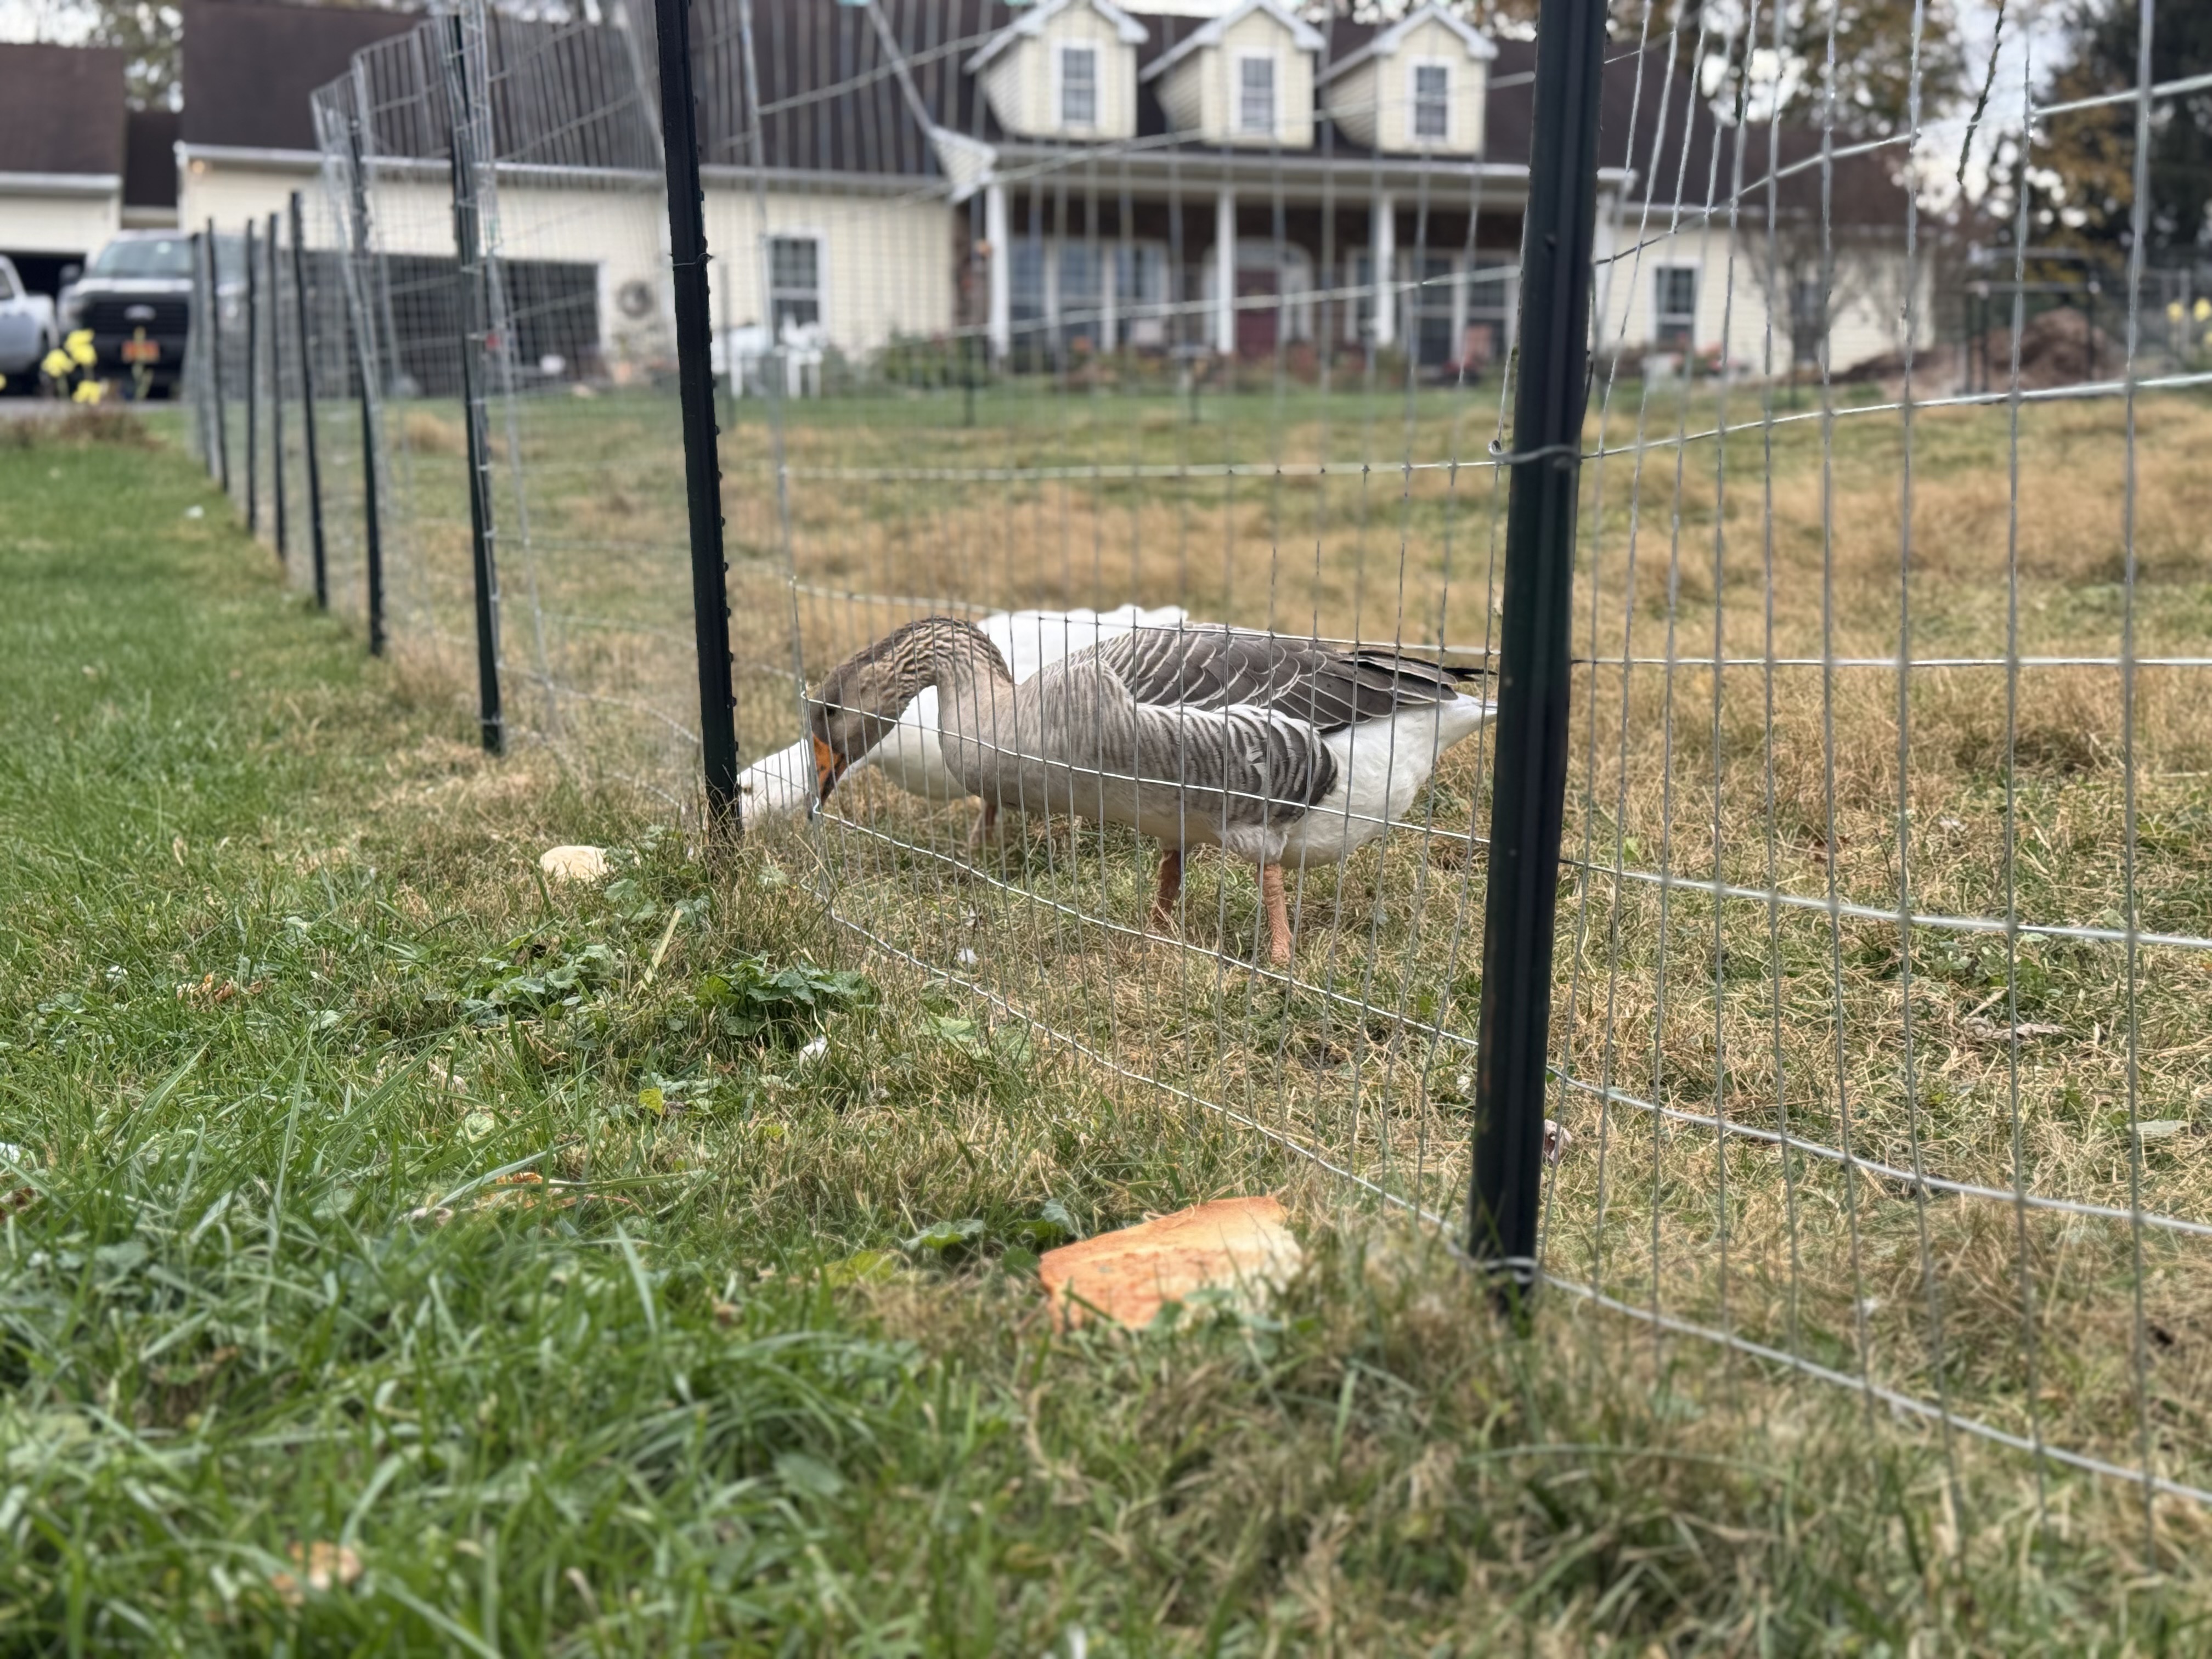
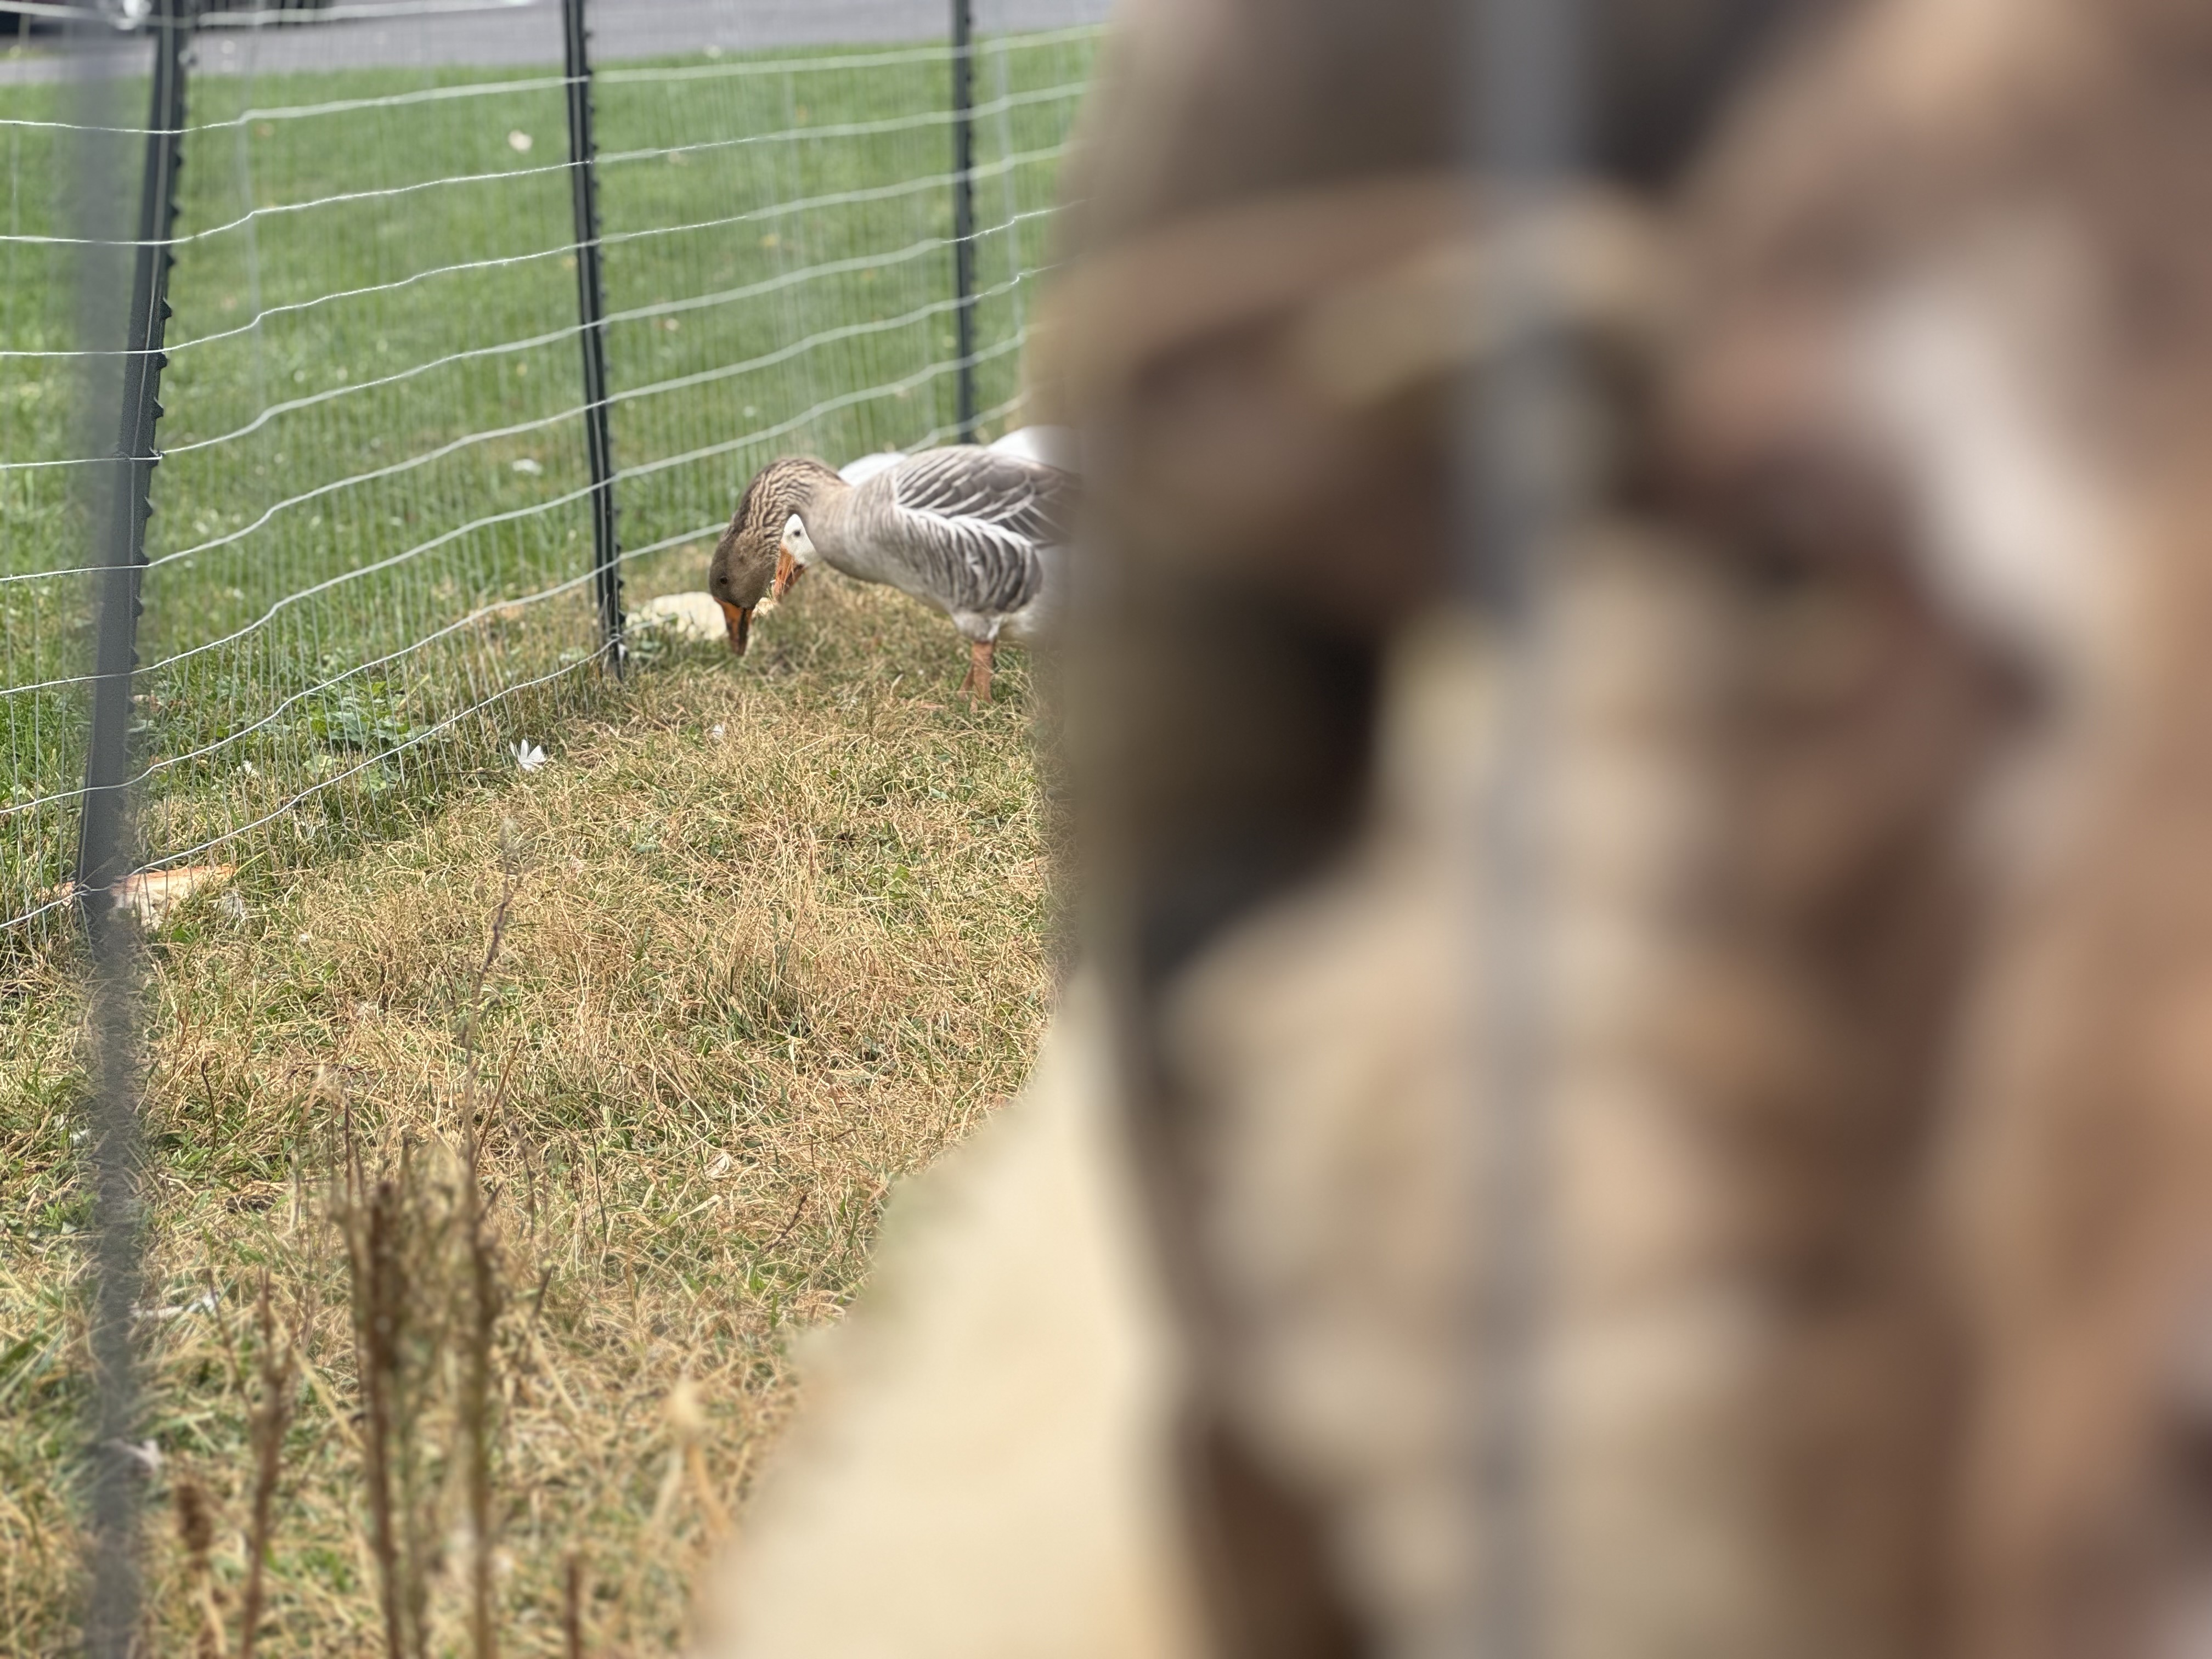
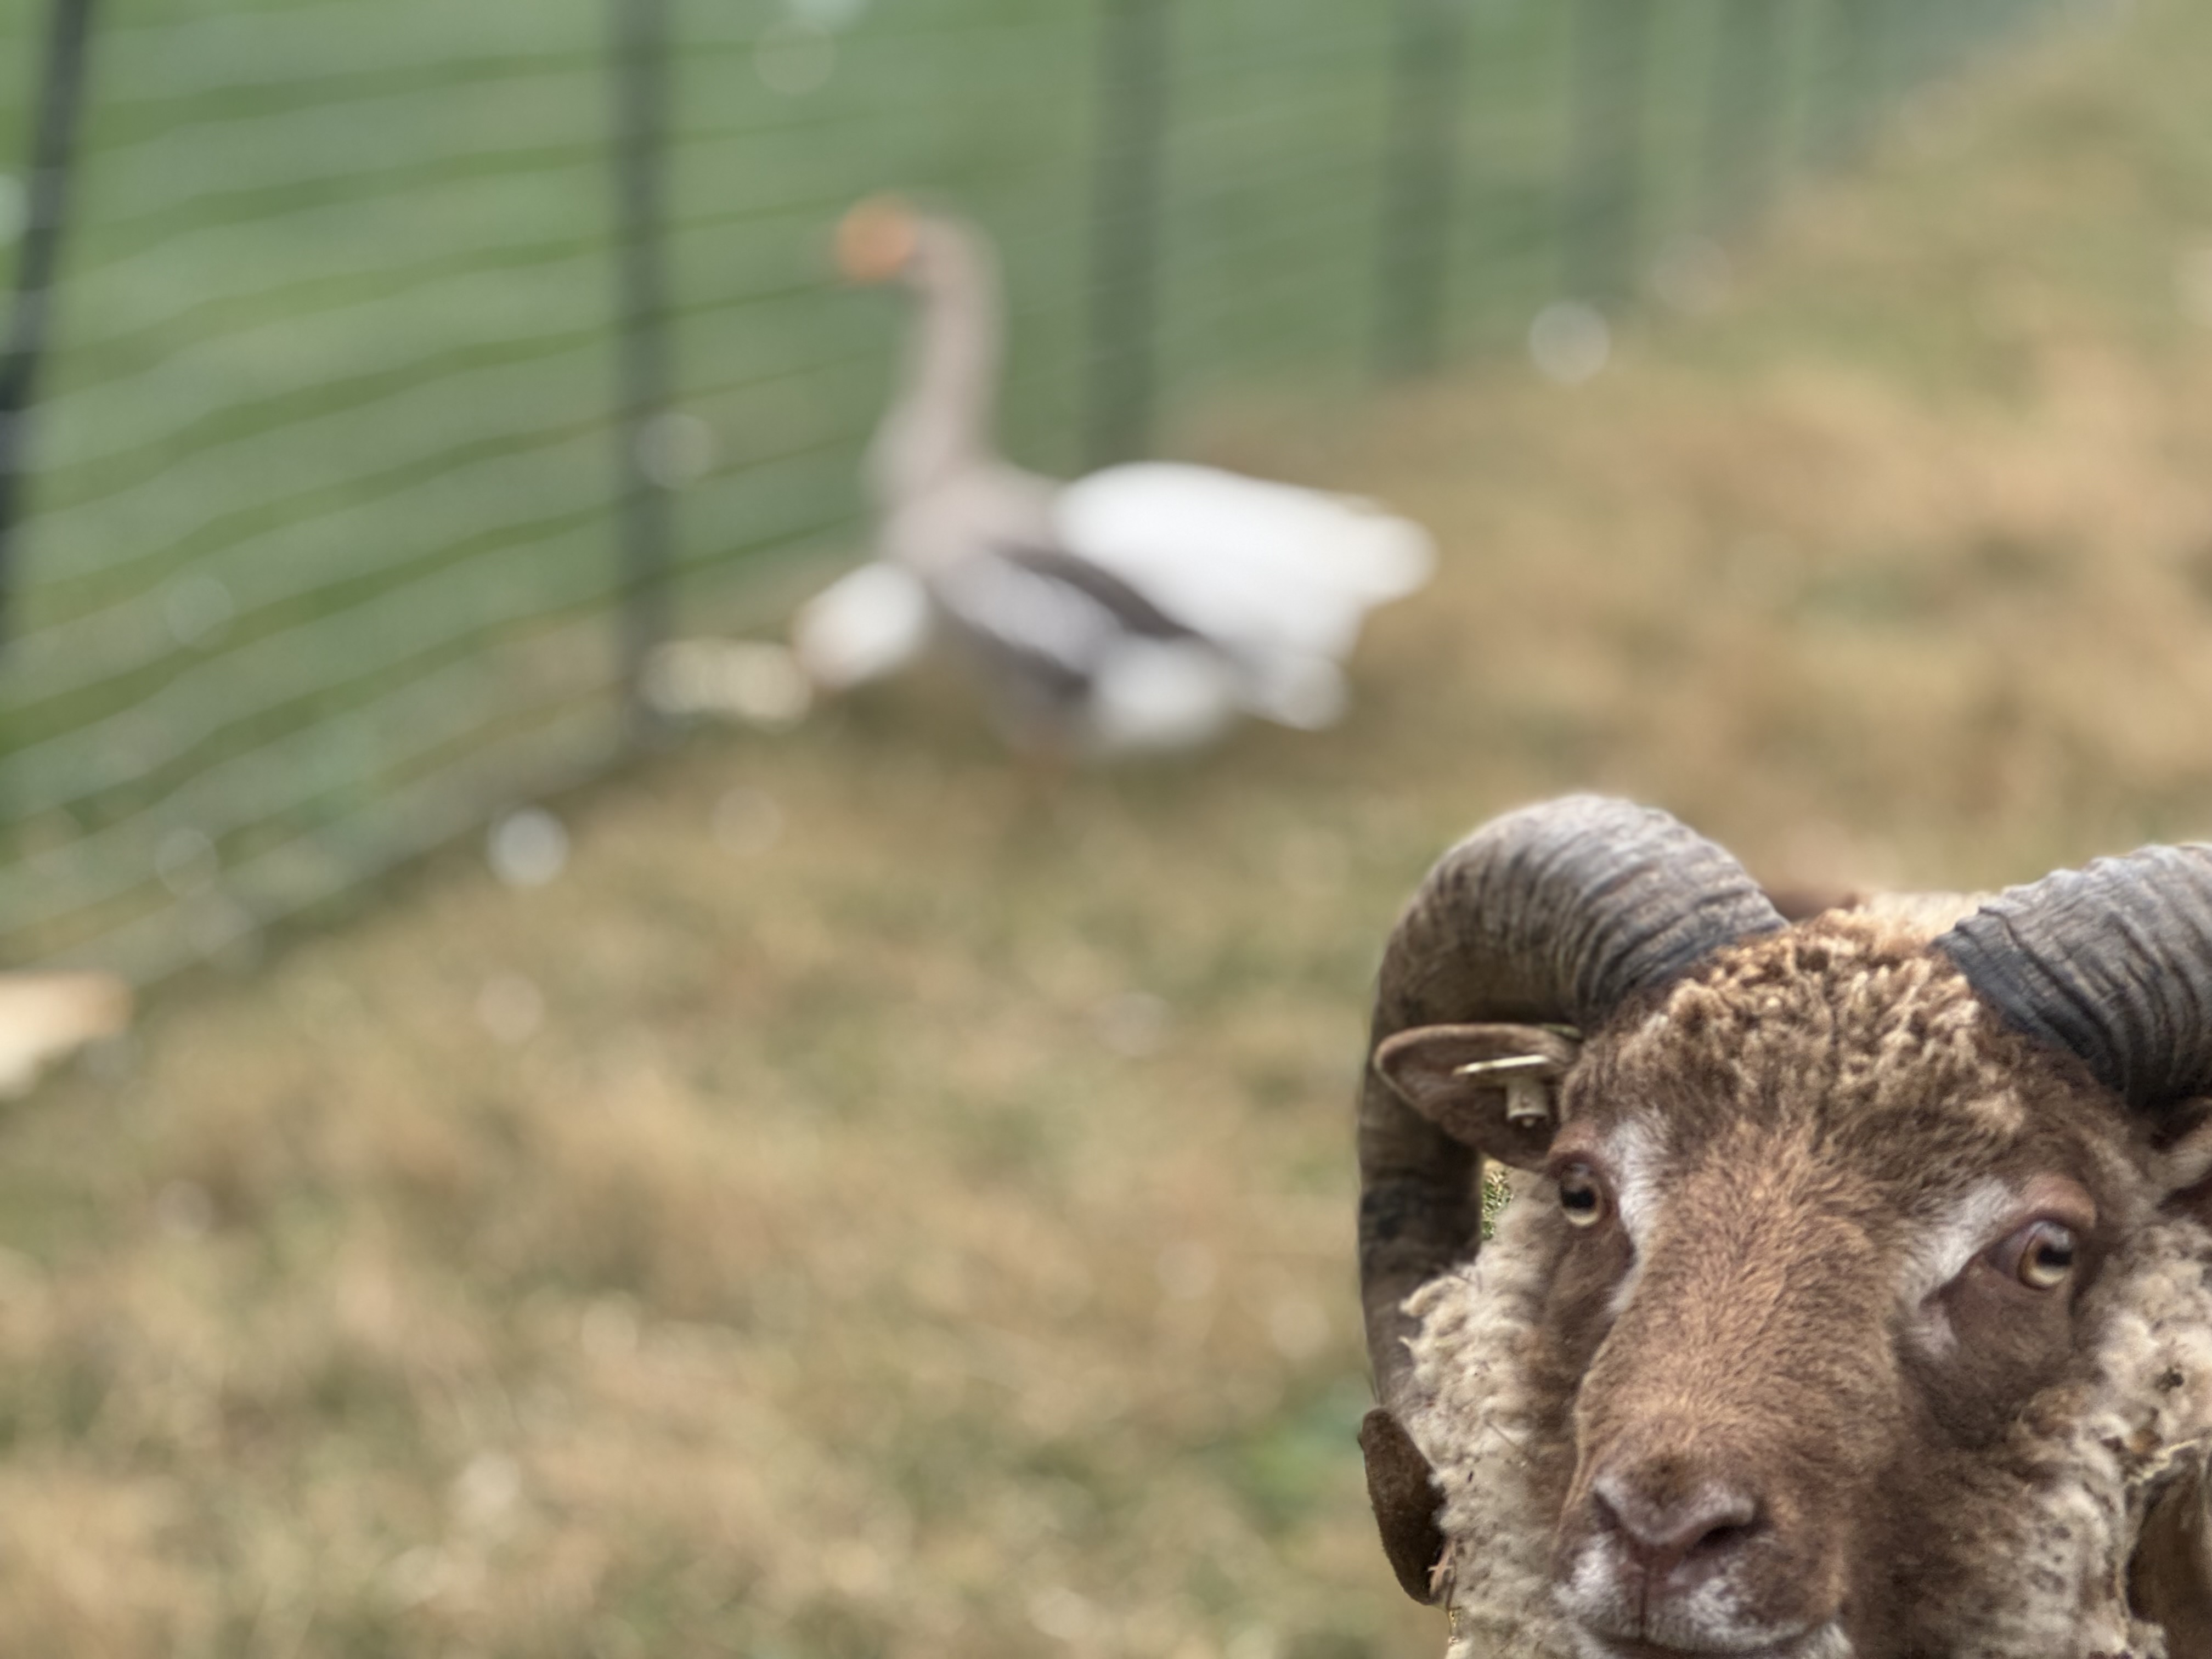
Take a look at how these photos break the scene into layers of distance to tell a story. In one shot, a bucket towers at the edge of the frame while a garden hose trails off across the grass toward a distant red shed under a gray sky. In others, we are separated from a pair of squabbling geese by the grid of a wire fence, a piece of orange bread in the grass, or the massive, out-of-focus curve of a sheep’s horn right in front of the lens.
Whether peering through leafy branches or locking focus onto a curious sheep in the foreground, ask yourself how each photograph uses the foreground to influence your perception of the subject.
Guiding Questions
How does getting low and close change the scale?
Look at the photo of the bucket on the left with the hoses trailing across the grass toward the red shed. By placing the camera down low right beside the bucket, an everyday chore turns into a dramatic landscape. How do the towering bucket in the foreground and the leading lines of the hose work together to show the distance the photographer has to walk?How can a blurry foreground act as a frame?
Look at the shot where the massive, out-of-focus sheep takes up the right half of the frame while the two geese eat in the middle distance. Even though the sheep is blurred into over-processed bokeh, we can still tell an animal is standing right next to the camera. How does using a shallow depth of field in the foreground guide your eye straight to the sharp subject behind it?What happens when you flip the focus to the front?
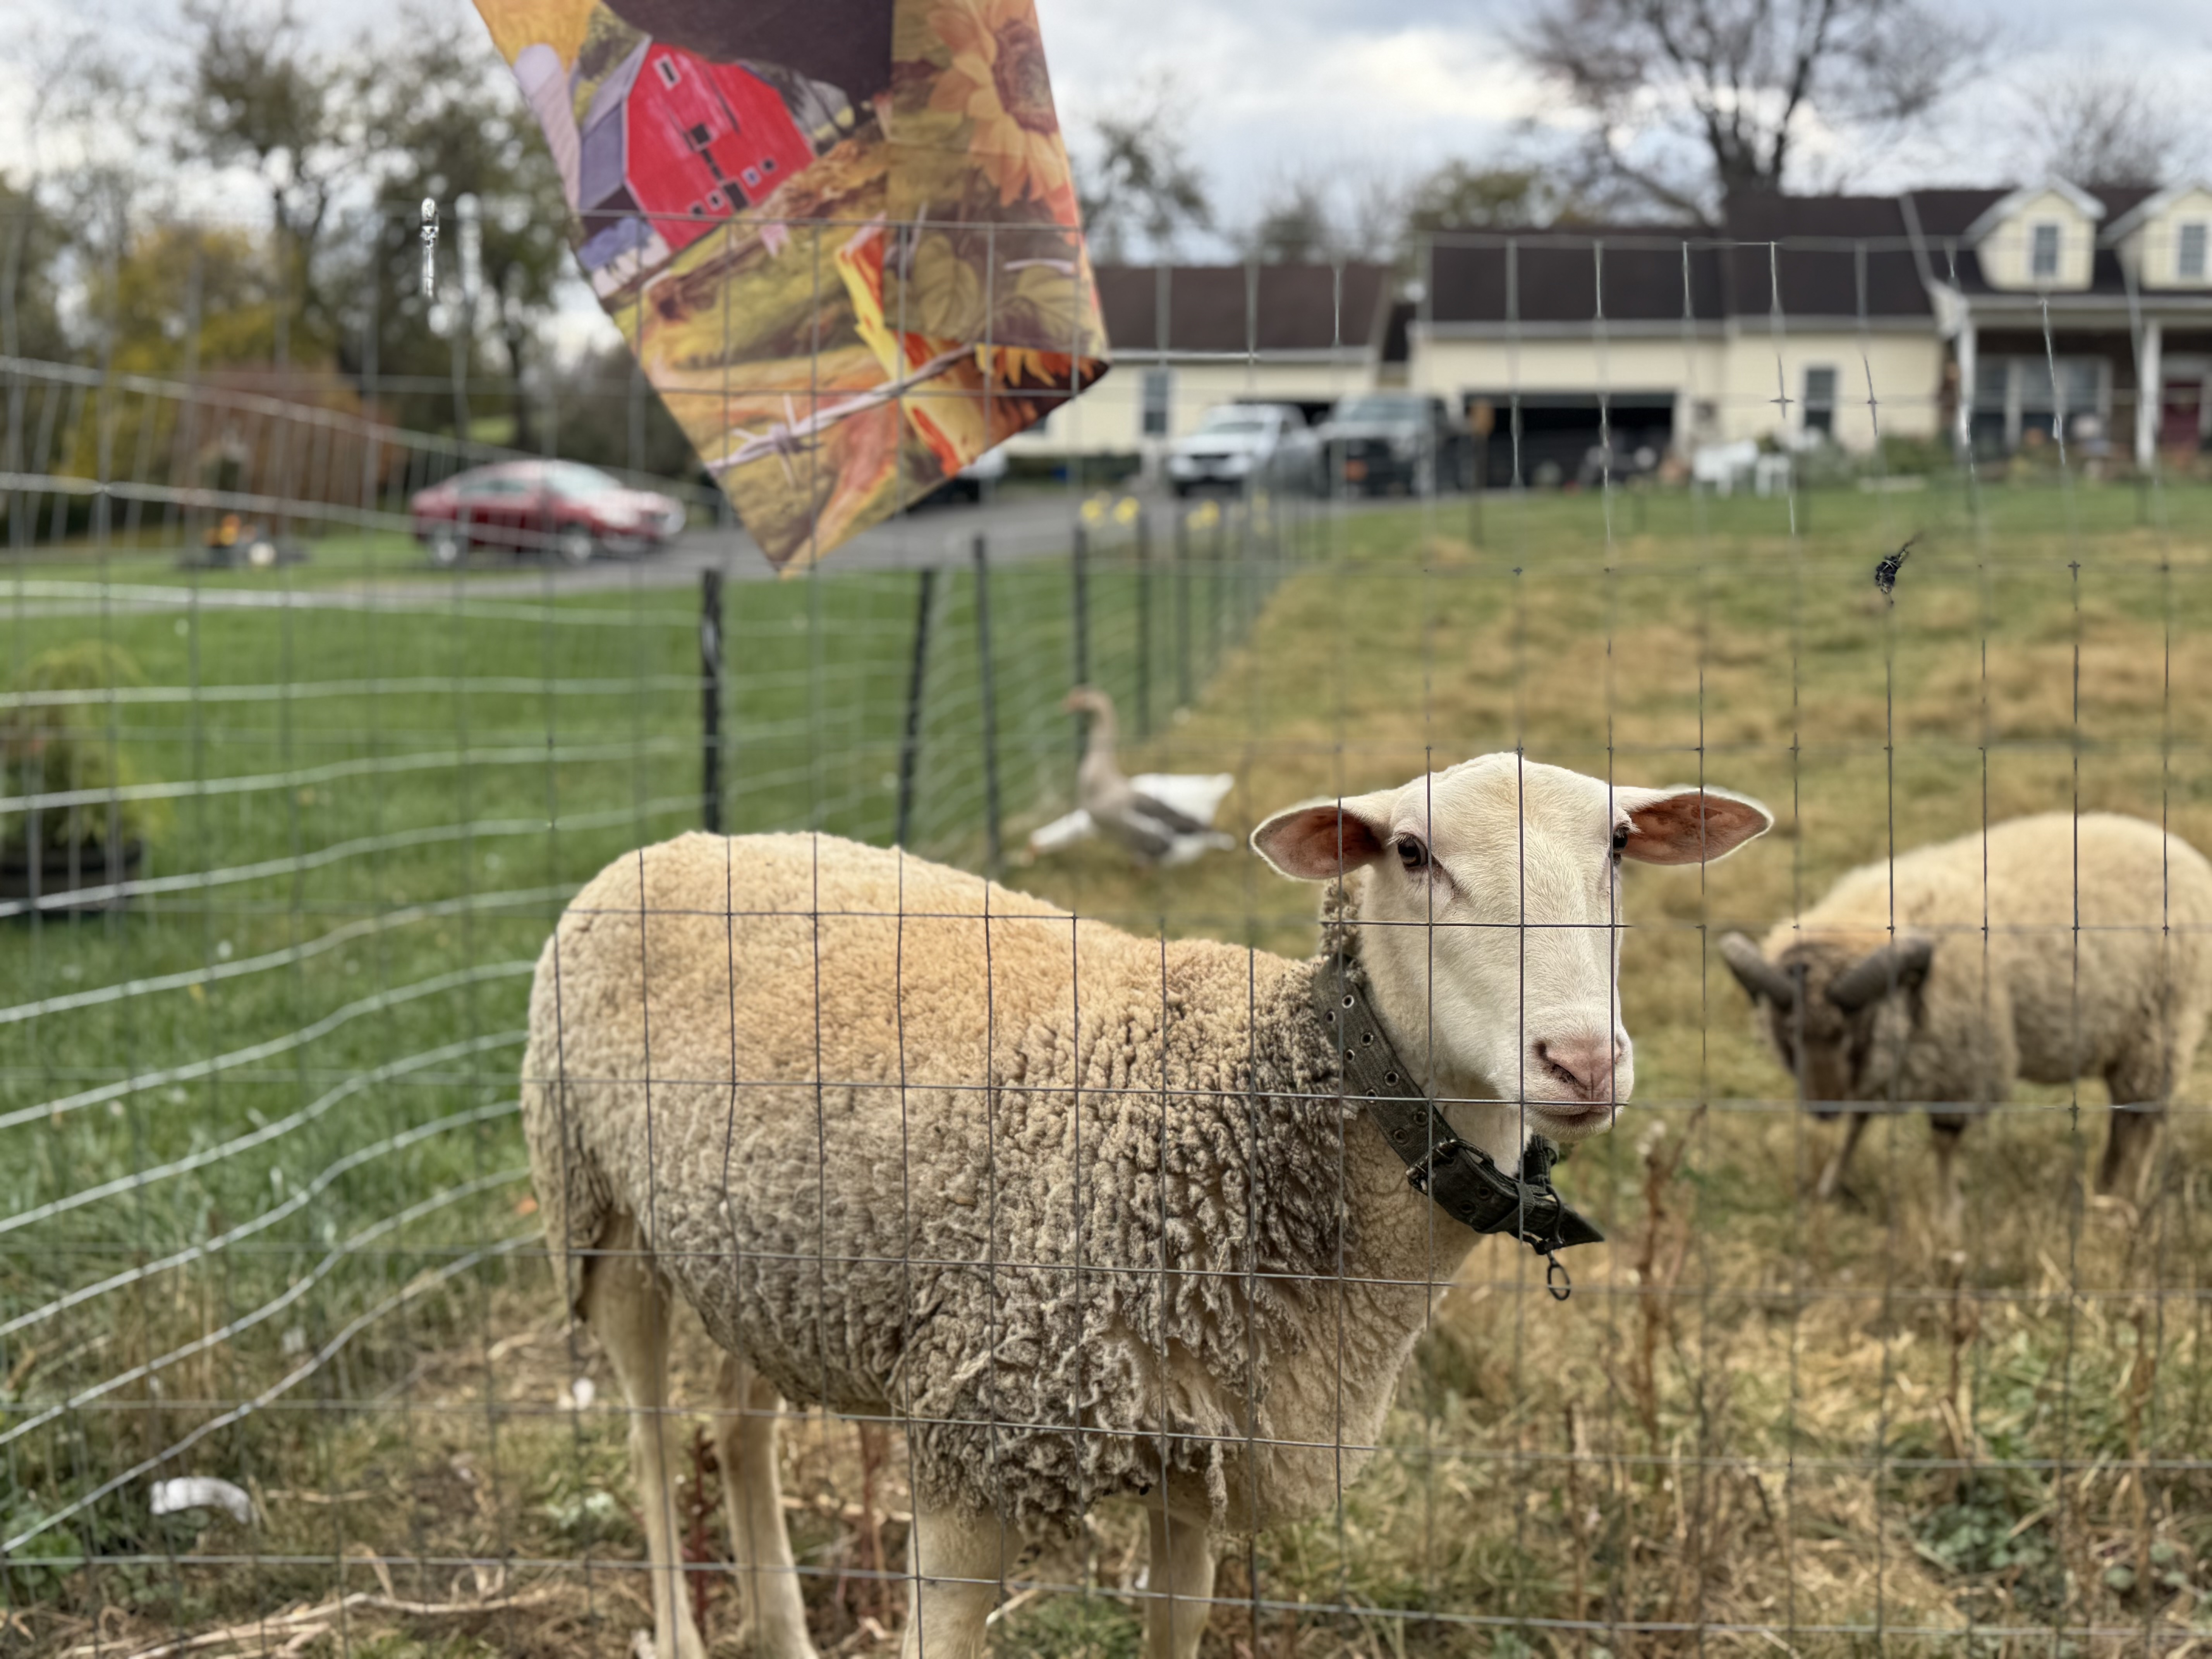
Compare the blurry foreground sheep to the sharp sheep, where the goose in the background melts into a soft blur. Both photos contain the exact same layers: a fence, a goose, and a sheep. How does changing which layer gets the sharp focus completely rewrite who the main character is?Does the barrier separate you or place you in the scene?
Look at the self-portrait taken through the branches of the apple tree and the shot of the geese eating behind the wire fence. In both images, an obstacle sits directly between the lens and the subject. Does looking through the leaves and wire make you feel pushed away from the subject, or does it make you feel like you’re inside the scene?Can a small detail in the foreground explain the action?
Look closely at the bottom of the frame in the photo where geese peck at a piece of bread. How can placing the second piece of bread in the foreground help the audience understand why the subjects in the midground are behaving the way they are?How do you keep a multi-layered scene from feeling cluttered?
In the last photo there is a hanging autumn flag at the top, a wire fence, a white sheep in a collar looking toward us, a second sheep grazing to the right, and a blurry goose and house in the background. With so many layers competing for attention, how do brightness, color contrast, and eye lines help the central sheep stand out from the crowd?
Self-Assessment Checklist & Rubric
To get the most out of photography club, ask yourself these questions and aim for High Quality (3) in all of your photos. Remember that it’s ok to share Low Quality photos, especially if you have questions about how to improve them.
▢ Posted multiple photos.
▢ Commented on other’s photos.
▢ Participated in discussion.
| High Quality (3) | Mediocre Quality (2) | Low Quality (1) | |
|---|---|---|---|
| Concept / Theme | The photo deliberately uses a foreground layer to create a clear sense of depth, place or separate the viewer, or tell a multi-layered story. | The photo includes a foreground element, but it feels more like accidental clutter than a deliberate part of the story. | The photo has no real foreground, or whatever sits in front of the subject plays no part in the story. |
| General Composition | Compositional tools (framing, leading lines, eye lines, bokeh) work together with the foreground and background layers to guide the viewer’s eye through the scene. | The composition includes layers, but the foreground blocks the subject awkwardly or distracts from the rest of the frame. | The photo shows little control over framing, background clutter, or subject placement. |
| Depth & Layer Separation | The photographer controls focus, scale, or brightness so it’s clear which layer is the subject, whether that’s the foreground or something behind it. | We can see different distances in the scene, but muddled focus or flat lighting makes it hard to tell which layer is the true subject. | Everything in the scene blends together on a single flat plane with no intentional control over focus or depth. |
| Originality | The photographer combined their interpretation of the theme with deliberate layering, angle, and focus choices to create a captivating, unique image. | The photographer attempted to find a unique perspective on foreground and depth, even if the result isn’t perfect. | The photo is dull or derivative. |